In this step-by-step guide, I will explain how to test the water in your aquarium using a water test kit. Testing the water is important for maintaining the health and well-being of your fish and other aquatic creatures. By following this guide, you will be able to accurately assess the water quality and make any necessary adjustments to ensure a thriving aquatic environment.
Dive into our Bestselling Water Test Kits!

Gather the necessary materials
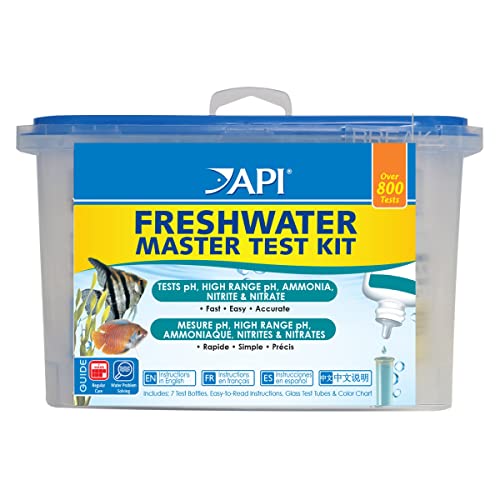
Before you start, gather a water test kit specifically made for aquariums. This kit should have test tubes, test solutions, and a color chart. For example, the API Freshwater Master Test Kit includes everything you need to test the key parameters of your aquarium’s water. Additionally, grab a pen and paper to jot down the results for reference later.

Prepare the test tubes
To prepare the test tubes, start by taking one of the test tubes from the kit and rinsing it with distilled water. This simple step is important as it helps eliminate any residue or contaminants that could potentially affect the accuracy of the test results. Remember to repeat this process for each test you plan to perform, ensuring clean test tubes for each analysis.
Collect a water sample
To collect a water sample from your aquarium, start by grabbing a clean container like a cup or a small jar. Make sure to avoid touching the inside of the container or contaminating the water. Next, gather samples from various areas of the tank to obtain an accurate reading. For instance, you could collect a sample near the surface, in the middle, and near the bottom of the tank. Remember, the more representative the samples, the better understanding you’ll have of the overall water quality.
Perform the pH test
To perform the pH test, start by adding a few drops of the pH test solution to one of the test tubes containing the water sample. Gently mix the solution and water together. Next, compare the color of the water to the pH color chart provided in the kit. This will help you determine whether the water is acidic or alkaline.
Conduct the ammonia test
To conduct the ammonia test, follow these steps:
- Take a different test tube and add a few drops of the ammonia test solution to another water sample.
- Refer to the instructions provided in the kit to determine the presence and concentration of ammonia in your aquarium water.
- Ensure you follow the recommended procedure to obtain accurate results.
- Remember, ammonia can be harmful to fish, so it’s vital to keep its levels in check to maintain a healthy environment for your aquatic pets.
Check for nitrites
To check for nitrites, follow these steps:
- Fill a test tube with water from your aquarium.
- Add a few drops of the nitrite test solution to the test tube.
- Close the test tube and shake it gently to mix the solution with the water.
- Wait for the color to develop.
- Compare the color of the solution with the color chart provided with the test kit.
- Record the result and take appropriate action if necessary.
For example, let’s say you add the nitrite test solution to the test tube and the color turns green. You compare it with the color chart and find that it corresponds to a medium level of nitrites. This indicates that there may be a moderate amount of nitrites in your aquarium water, and you should take steps to reduce their levels, such as performing a water change or using a nitrite remover product.
Test for nitrates
To test for nitrates in a fresh water sample, follow these steps:
- Fill a different test tube with the fresh water sample you want to test.
- Using a dropper, add a few drops of the nitrates test solution to the test tube containing the water sample.
- Gently shake the test tube to mix the solution with the water.
- Observe the color change in the solution. A darker color indicates a higher concentration of nitrates.
- Compare the color of the solution to the color chart provided with the test kit to determine the nitrate level.
- If the nitrate level is above the recommended safe range, take appropriate actions such as reducing fish waste and excess food, increasing water changes, or using nitrate-reducing additives to bring the levels within a safe range.
For example, if the color of the solution turns dark red after adding the nitrates test solution, it indicates a high nitrate level. In this case, you may need to increase water changes and adjust feeding habits to prevent further nitrate buildup.
Check water hardness
To check the water hardness in your aquarium, follow these simple steps:
- Obtain a water hardness test solution kit.
- Fill a clean test tube with a water sample from your aquarium.
- Add the specified number of drops of the test solution to the test tube.
- Close the test tube with the cap and shake it gently to mix the solution.
- Allow the solution to settle for the recommended time (usually a few minutes).
- Compare the color of the solution with the provided color chart.
- Determine the hardness level of your water based on the color match.
- Refer to the instructions or online resources to understand the ideal hardness range for your specific fish species.
- Take necessary measures to adjust the water hardness if needed, such as adding additives or using a water conditioner.
Regularly testing and maintaining the proper water hardness in your aquarium will help create a healthy and suitable environment for your fish.
Record and interpret the results
To record the results of the tests, start by noting down the readings for each parameter that you have tested. Then, compare these readings to the recommended levels for your specific fish species. If any of the readings are outside the optimal range, take appropriate actions such as performing water changes or adjusting your aquarium maintenance routine to ensure the best possible water conditions for your fish. Remember to keep a record of the results and any actions taken for future reference.
Wrapping up your water testing journey
In conclusion, testing the water in your aquarium is not only important, but also quite easy to do. By regularly monitoring the water parameters and interpreting the results correctly, you can make informed decisions about the health and well-being of your aquatic pets. So, don’t forget to test the water and keep your aquarium a thriving and beautiful home for your fish and other aquatic creatures. Happy testing!
What You’ll Need
Helpful Hints
My Experience with the Api Freshwater Aquarium Master Test Kit: A Step By Step Guide!
Getting Started with Your Aquarium Water Test Kit
- Read the instructions: Start by carefully reading the instruction manual that comes with your aquarium water test kit. It will provide detailed information on how to use the kit effectively and interpret the results accurately
- Gather the materials: Collect all the necessary materials needed for the test, which typically include test tubes, test reagents, color comparison charts, and a clean water source
- Prepare the water sample: Take a water sample from your aquarium using a clean container or the provided test tube. Ensure the sample represents the overall condition of the aquarium water by collecting it from different areas of the tank
- Perform the tests: Follow the instructions provided with the kit to perform each test. The tests usually measure parameters such as pH, ammonia, nitrite, and nitrate levels. Add the appropriate reagents to the test tubes, mix well, and observe the color changes
- Interpret the results: Compare the color of the water in the test tube with the color comparison chart provided. Each color corresponds to a specific value or range, indicating the parameter being tested. Record the results and take necessary actions based on the recommendations provided in the manual
- Remember, regular water testing is essential for maintaining a healthy aquarium environment for your fish and other aquatic organisms. If you have any doubts or concerns, don’t hesitate to consult a professional or experienced aquarist for guidance. Happy testing!
Frequently Asked Questions about Aquarium Water Test Kits
How do I interpret the test results provided by an aquarium water test kit?
Sure! When interpreting the test results provided by an aquarium water test kit, there are a few key things to consider. First, carefully follow the instructions on the test kit to ensure accurate results. Once you have conducted the tests, you will typically have a color chart or numerical values to compare your results with.
Different test kits may measure various parameters such as pH, ammonia, nitrite, nitrate, or other water parameters. For each parameter, there will be a recommended range for optimal aquarium conditions. Your goal is to ensure that the test results fall within these ranges.
For example, if you are measuring pH, the test kit will indicate the ideal pH range for your specific type of aquarium. If your test result falls outside of this range, it may be necessary to take corrective measures to adjust the pH level.
Remember, it’s important to consider the overall health and specific needs of the fish or plants in your aquarium. Some species may require certain water parameters to thrive, while others may be more adaptable.
If you find that your test results are consistently outside of the recommended ranges, it’s advisable to take action to address any water quality issues. This could involve adjustments to filtration, water changes, or using water conditioners or additives to stabilize the parameters.
Regularly monitoring and interpreting the test results from your aquarium water test kit will help you maintain a healthy and thriving aquatic environment. If you have any specific concerns or questions about your test results, it’s always a good idea to consult with a knowledgeable aquarist or professional for further guidance.
Hello! I’m Ava Wilson, the passionate founder of Pet Pantry Place, your go-to destination for all things pet-related. My mission is to create a platform where fellow pet enthusiasts can discover the finest supplies and gain valuable insights to ensure a joyful and fulfilling life for their pets.