Hey there! So, the purpose of this step-by-step guide is to help you maintain your aquarium gravel vacuum. Now, you might be wondering what an aquarium gravel vacuum is and why it’s important. Well, an aquarium gravel vacuum is a tool that helps you clean the gravel in your fish tank, removing debris and waste that can accumulate over time. It’s crucial to maintain it properly to ensure a clean and healthy environment for your aquatic friends. So, let’s dive right in and learn how to keep your aquarium gravel vacuum in tip-top shape!
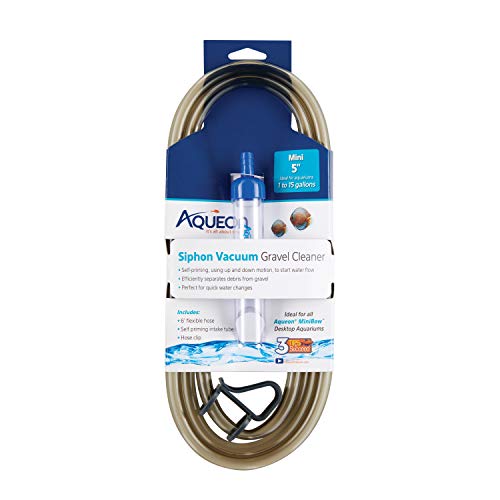
Top-Selling Gravel Vacuums for Aquariums!

Prepare the aquarium
To prepare the aquarium for cleaning, start by removing any decorations or obstacles that could obstruct the gravel vacuum. These items may include artificial plants, rocks, or any other decor that is not firmly attached to the aquarium. It is important to clear the way for effective cleaning and to ensure that no debris is left behind.
For example, if you have a plastic plant in your aquarium, gently lift it out and set it aside. If there are any rocks or driftwood, carefully take them out as well. Make sure to keep them in a safe place where they won’t get damaged. By removing these items, you will have a clear path to thoroughly clean the gravel without any hindrances.
Remember, the aim is to provide the best environment for your aquatic pets, and maintaining a clean aquarium is crucial for their health and well-being. So, take a few minutes to remove any decorations or obstacles before proceeding with the gravel vacuum. Your fish will thank you for it!

Attach the gravel vacuum
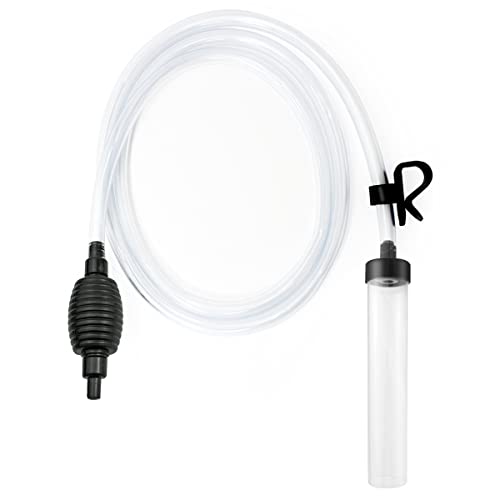
To connect the gravel vacuum to the appropriate tubing or hose, follow these simple steps. First, locate the tubing or hose that came with your gravel vacuum kit. Make sure it is the correct size and length for your tank. Then, take one end of the tubing or hose and attach it securely to the intake or suction side of the gravel vacuum. This is usually indicated by an arrow or label on the vacuum itself.
Next, find the other end of the tubing or hose and connect it to the appropriate outlet or attachment on your aquarium filter or water pump. Again, ensure a secure fit by properly aligning and pushing the tubing or hose onto the outlet. If there are any clamps or connectors provided with your kit, use them to tighten and secure the connections further.
By following these steps, you can easily connect the gravel vacuum to the appropriate tubing or hose, ensuring a secure fit. This will allow you to effectively clean your aquarium substrate without any worries of disconnections or leaks. Happy cleaning!
Position the aquarium gravel vacuum
To position the aquarium gravel vacuum effectively, follow these simple steps:
- Place the vacuum head on the gravel bed: Start by inserting the vacuum head into the aquarium, ensuring that it reaches all the way down to the gravel bed. Position it near the area you want to clean.
- Angle the vacuum head: Tilt the vacuum head at a slight angle to optimize suction power. This angle allows the vacuum to better draw in debris and waste from the gravel. Experiment with different angles to find the most effective one for your specific setup.
- Move the vacuum head slowly: To ensure thorough cleaning, move the vacuum head slowly across the gravel bed. This allows the suction to capture any dirt or debris that may be embedded in the substrate. Take your time and be patient to achieve the best results.
For example, imagine you have a freshwater aquarium with a gravel substrate. You would start by positioning the vacuum head directly onto the gravel bed near the corner of the tank. Then, tilt the vacuum head slightly to form a V-shape with the substrate. Slowly move the vacuum head in a sweeping motion across the gravel, making sure to cover the entire area you want to clean. This method will effectively remove any waste or debris that has settled within the gravel, keeping your aquarium clean and healthy.
By following these steps, you can ensure that your aquarium gravel vacuum is properly positioned for efficient cleaning. Happy cleaning!
Start the siphon
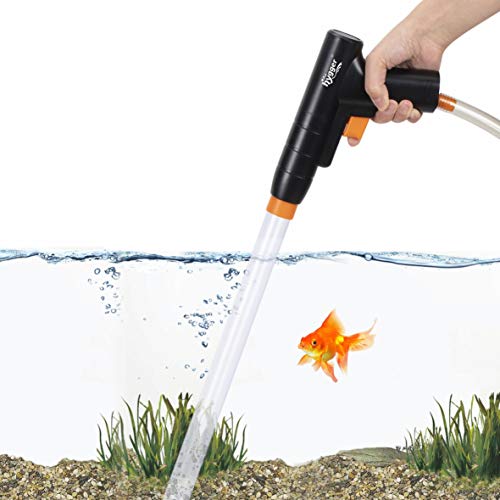
Submerge the vacuum head in the water, ensuring that it is completely immersed. Allow the vacuum head to fill with water by holding it under the surface until no air bubbles are visible. This step is crucial as it helps create a proper seal and ensures efficient siphoning.
Next, you can create a siphon either by manually siphoning or by using a pump. If you choose to manually siphon, place one end of a flexible tube into the vacuum head and the other end into a bucket or drain. Once both ends are securely in place, suck on the tube to initiate the flow of water. As the water starts flowing, carefully move the vacuum head around to clean the desired area, keeping the tube at a lower level than the vacuum head to maintain the siphon.
Alternatively, if you prefer to use a pump, connect one end of the flexible tube to the vacuum head and the other end to the appropriate outlet on the pump. Activate the pump according to its instructions, and it will draw water from the vacuum head, creating the siphon effect. This method can be particularly useful for larger cleaning tasks or when manual siphoning may not be convenient.
Remember to always exercise caution when working with water and electrical devices. Ensure proper safety measures are in place and follow any additional instructions provided by the equipment manufacturer. Happy cleaning!
Clean the gravel
Move the vacuum head slowly over the gravel, allowing it to pick up debris and waste. Start by positioning yourself at one end of the aquarium and hold the vacuum hose firmly in one hand. With a gentle but steady motion, guide the vacuum head across the gravel, moving it back and forth in small sections. Make sure to cover the entire surface of the gravel, working your way towards the opposite end of the tank.
As you move the vacuum head, pay attention to any visible debris or waste being sucked up. This can include uneaten food, fish waste, or decaying plant matter. Keep an eye on the collection chamber of the vacuum to monitor how much has been picked up. Continue the process until you are satisfied with the cleanliness of the gravel. Remember to always move slowly and deliberately to avoid disturbing the gravel too much and causing cloudiness in the water.
Here’s an example to illustrate the process: Start by placing the vacuum head at one corner of the aquarium, near the gravel. Hold the vacuum hose firmly and turn on the suction. Slowly move the vacuum head across the gravel, using a gentle side-to-side motion. As you do this, you might notice bits of uneaten fish food and plant debris being sucked up into the vacuum. Keep going, working your way towards the other end of the tank, until you have covered the entire gravel surface. Take breaks if needed, especially if you have a large aquarium. Once you are satisfied with the cleanliness, turn off the suction and carefully remove the vacuum from the tank.
Wrapping Up
In conclusion, maintaining an aquarium gravel vacuum is crucial for the health and cleanliness of your aquarium. By following the steps outlined in this guide, you can ensure that your gravel vacuum is working effectively and your aquarium remains in optimal condition. Remember to regularly clean and maintain your gravel vacuum, as well as perform routine aquarium maintenance, to keep your aquatic friends happy and thriving. Happy fishkeeping!
Gather Your Supplies!

Simple Solutions
The Ultimate Guide: Gravel Vacuuming Your Fish Tank Like a Pro! #aquariumcoop
Tips and Tricks for Effortless Aquarium Gravel Vacuuming!
- Start by filling a clean bucket with water from the aquarium. This bucket will be used to collect the dirty water during the vacuuming process
- Next, attach the gravel vacuum to a siphon or a water pump, following the instructions provided by the manufacturer. Make sure it is securely attached to avoid any leaks
- Submerge the gravel vacuum into the aquarium, ensuring that the end with the nozzle is close to the substrate or gravel. Be gentle to avoid disturbing the fish or plants
- Once the vacuum is properly positioned, start the siphon or pump action. This will create a flow of water that will help to remove debris and waste from the substrate
- Slowly move the gravel vacuum around, making sure to cover the entire surface area of the aquarium. Allow the vacuum to suck up any accumulated dirt, uneaten food, or fish waste from the gravel
- During the process, keep an eye on the bucket collecting the dirty water. If the water level gets too high, pause the vacuuming and empty some of the dirty water to avoid overflow
- Remember to stop the siphon or pump action before removing the gravel vacuum from the aquarium to avoid any accidental spills
- Finally, check the water level and quality in the aquarium after the gravel vacuuming process. If necessary, add some dechlorinated water to compensate for the water removed during the cleaning
- Please note that these are general instructions, and it’s always a good idea to consult the specific instructions provided with your aquarium gravel vacuum for the best results. Happy cleaning!
Frequently Asked Questions about Aquarium Gravel Vacuums
Are there any alternatives to using a gravel vacuum for cleaning the substrate?
Yes, there are alternative methods to cleaning the substrate without using a gravel vacuum. One option is to use a siphon hose to manually remove debris from the substrate by gently stirring it up and then carefully siphoning out the water along with the waste. Another alternative is to use a turkey baster or a pipette to spot-clean specific areas of the substrate where there is visible debris. Additionally, you can introduce bottom-dwelling fish or invertebrates, like snails or shrimp, that can help keep the substrate clean by naturally foraging and consuming waste. Finally, using a fine mesh net to skim the surface of the substrate can also help remove larger debris. It’s important to note that these alternatives may not be as efficient as a gravel vacuum, but they can still be effective in maintaining a clean substrate in your aquarium.
Hello! I’m Ava Wilson, the passionate founder of Pet Pantry Place, your go-to destination for all things pet-related. My mission is to create a platform where fellow pet enthusiasts can discover the finest supplies and gain valuable insights to ensure a joyful and fulfilling life for their pets.