Hey there! So, in this step-by-step guide, I’ll walk you through the process of building an outdoor hutch for your adorable bunnies. Did you know that rabbits have a superpower? They can jump up to 3 feet high! Now, let’s get started with the hutch building adventure, shall we?
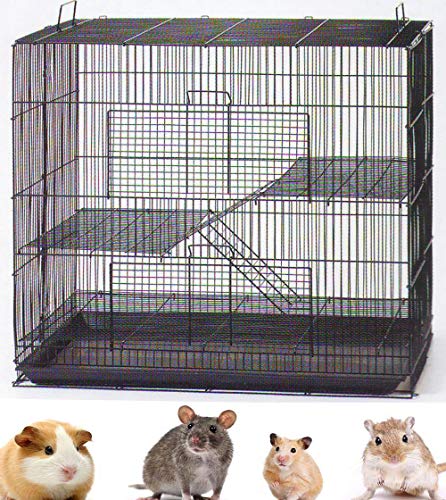
Top-Rated Cages and Enclosures for Every Need!


Gather the necessary materials
Before starting the construction, gather all the necessary materials to ensure a smooth and efficient building process. You will need wood panels, screws, a drill, wire mesh, hinges, and a latch. It’s essential to select materials that are sturdy and weather-resistant to ensure the longevity of the hutch. Sturdy wood panels will provide a solid structure, while weather-resistant materials will protect the hutch from the elements, such as rain and sunlight.
To start, measure and cut the wood panels to the desired dimensions of your hutch. Ensure the panels are the right size, as this will determine the overall dimensions of the hutch. Use a drill to create pilot holes in the panels, which will make it easier to secure the screws later on. Next, attach the wire mesh to one of the panels using screws, creating a secure and protective enclosure for your furry friend. Then, attach the remaining wood panels together using the hinges, allowing for easy access to the hutch. Finally, add a latch to ensure the hutch is securely closed when necessary. By following these steps and using the recommended materials, you’ll be well on your way to constructing a sturdy and weather-resistant hutch for your pet.
Design and measure the hutch
Plan the dimensions of your hutch based on the number of rabbits you have and the space available in your backyard. Start by considering the number of rabbits you will be housing. Each rabbit needs enough space to move around comfortably, so take that into account when determining the size of your hutch. Next, assess the available space in your backyard where you plan to place the hutch. Measure the area and make note of any restrictions or obstacles you need to work around.
Once you have an idea of the dimensions you want for your hutch, it’s time to measure and mark the wood panels according to your design. Begin by laying out the wooden panels on a flat surface and using a measuring tape, mark the desired lengths and widths. It’s important to keep in mind the need for a comfortable living space for the rabbits, so ensure that the dimensions allow for adequate room to move and stretch. Take into consideration the height as well, as rabbits enjoy vertical space for hopping and climbing.
By carefully planning and measuring the dimensions of your hutch, you can create a comfortable and spacious living area for your rabbits in your backyard.
Construct the frame
To construct the frame of the hutch, begin by gathering all the necessary wood panels. Lay them out in the desired shape and position, making sure to align the edges properly. With a screwdriver or drill, use screws to securely join the panels together. Start at one corner and work your way around, adding screws at regular intervals along the edges. Make sure to tighten the screws firmly, but be careful not to overtighten and damage the wood. This will help ensure that the frame is sturdy and durable.
Once all the panels are joined together, check that the frame is stable and level. Place a level tool on top of the frame and adjust as needed until it is perfectly level. This is important to provide a solid and steady base for the hutch. If the frame is not level, adjust the panels or use shims to even it out. Once you are satisfied with the stability and levelness of the frame, you can move on to the next step of the hutch construction.
Add wire mesh and doors
Attach wire mesh to the sides of the hutch to provide ventilation and protection from predators. To do this, follow these simple steps:
- Measure the dimensions of the hutch sides and cut the wire mesh accordingly. Make sure the mesh is slightly larger than the sides to ensure complete coverage.
- Use a staple gun or wire clips to secure the wire mesh to the hutch. Space the staples or clips evenly along the edges, ensuring that the mesh is firmly attached.
- Cut out appropriate openings for the doors. Depending on the design of your hutch, you may need to cut out one or multiple openings. Use wire cutters or a sturdy pair of scissors to carefully remove the mesh in the desired shape and size.
- Attach hinges to the cut-out sections of the wire mesh and the corresponding areas on the hutch. Ensure that the hinges are securely fastened to allow the doors to open and close smoothly.
- Finally, add a latch to keep the doors securely closed. Attach the latch to the hutch frame and door, ensuring that it is positioned correctly for easy operation.
By following these steps, you can easily add wire mesh and doors to your hutch, providing both ventilation and protection for your furry friends.
Finishing touches
Inspect the hutch carefully for any sharp edges or rough surfaces that could potentially harm the rabbits. Carefully run your hands over all the surfaces, paying close attention to corners and edges. If you notice any rough areas, take a piece of sandpaper and gently sand them down until the surface feels smooth. This will help prevent any injuries to the rabbits and ensure their safety.
Once you have finished sanding, it is important to apply a weather-resistant finish to protect the wood from the elements. Choose a suitable outdoor finish that is safe for animals and apply it according to the manufacturer’s instructions. This will help prevent the wood from rotting or deteriorating due to rain, humidity, or exposure to sunlight. By protecting the hutch, you are ensuring its longevity and providing a safe and comfortable environment for your rabbits.
Lastly, carefully choose a suitable location in your outdoor space to place the hutch. It should be an area that offers sufficient shade and protection from harsh weather conditions. Avoid placing the hutch in areas where it may be exposed to extreme temperatures or direct sunlight for prolonged periods. Additionally, make sure the hutch is secure and stable, as rabbits can be quite active and may accidentally knock it over if it is not properly secured. By selecting the right location, you are creating an optimal environment for your rabbits to thrive and enjoy their new hutch.
Wrapping It Up!
In conclusion, building an outdoor hutch for your rabbits is a rewarding and fulfilling project. By simply following the steps outlined in this blog post, you can create a safe and comfortable home for your furry friends. Don’t forget to provide plenty of hay, water, and a cozy bedding area inside the hutch to ensure their ultimate comfort. Enjoy the process and cherish the joy of seeing your rabbits happy in their new home!
Gather Your Supplies!

Building a Rabbit Hutch: Affordable and Simple Steps
Building Made Easy!
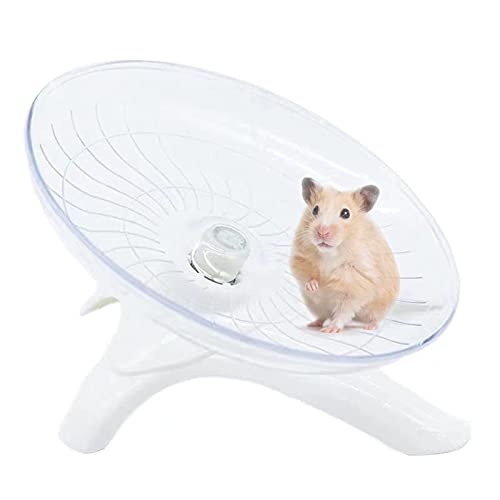
Getting Started with Cages and Enclosures
- Choose the right size: Make sure the cage or enclosure you select is appropriate for the size and species of the animal you are housing. Adequate space is essential for the comfort and well-being of your pet
- Provide proper ventilation: Ensure that the cage or enclosure has sufficient airflow to prevent the build-up of odors and maintain a healthy environment for your pet. This can be achieved through proper design and the use of ventilation systems if necessary
- Consider the material: There are different materials used for cages and enclosures, such as wire, plastic, or glass. Each material has its own advantages and disadvantages, so consider factors like durability, visibility, and ease of cleaning before making a choice
- Furnish with essentials: Include the necessary items inside the cage or enclosure, such as a water bottle or bowl, food dish, hiding spots, and toys/enrichment items. These items will provide comfort, stimulation, and meet your pet’s basic needs
- Regular maintenance: Regularly clean and sanitize the cage or enclosure to maintain a hygienic environment. Remove any waste, replace bedding, and disinfect surfaces as needed. This will help prevent the spread of diseases and keep your pet healthy
- Remember, providing a suitable cage or enclosure is crucial for the well-being of your pet. Feel free to ask if you have any more questions!
Frequently Asked Questions about Cages and Enclosures
How do you clean and maintain cages and enclosures properly?
To clean and maintain cages and enclosures properly, there are a few steps you can follow:
- Start by removing your pet from the cage or enclosure and placing them in a safe and secure temporary location.
- Empty out any bedding, substrate, or litter that may be present. Dispose of it properly, following the guidelines for your specific type of waste.
- Use a mild detergent or pet-safe disinfectant to clean the cage or enclosure. Make sure to scrub all surfaces thoroughly, including walls, floors, and any accessories or toys.
- Rinse the cage or enclosure with clean water to remove any soap residue. This step is important to ensure the safety of your pet.
- Allow the cage or enclosure to completely dry before adding fresh bedding, substrate, or litter. This will help prevent the growth of bacteria or mold.
- While the cage or enclosure is drying, take the opportunity to clean and sanitize any accessories, such as food and water bowls, toys, or hideouts. This step will help maintain a clean and hygienic environment for your pet.
- Once the cage or enclosure is dry and all accessories are clean, you can put everything back together and return your pet to its home.
Hello! I’m Ava Wilson, the passionate founder of Pet Pantry Place, your go-to destination for all things pet-related. My mission is to create a platform where fellow pet enthusiasts can discover the finest supplies and gain valuable insights to ensure a joyful and fulfilling life for their pets.